Sunday, December 6, 2009

Gingerbread Pancakes...for the love of spice!

Today is Saint Nicholas Day!!! As long as I can remember my family has always celebrated this feast day. Traditionally you are to leave your left shoe outside your door so when Saint Nicholas stops by he will fill your shoe with either treats or coal. I come from a very large extended family, and my mom has always sent decorated treat bags full of something to all our relatives and friends. Quite a task, and I am impressed that she has continued to do it even though the family has grown so large...not as in gaining weight, but as in many bodies. Although Saint Nicholas is from Myra, also known as modern day Turkey, many other countries celebrate his Feast day. Saint Nicholas is the patron saint of Sailors, merchants...ironically, archers, children, and students.

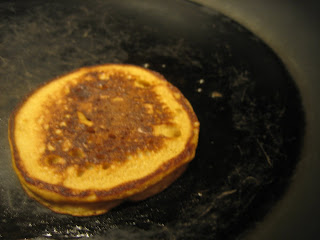
Traditionally "Speculaas" cookies are served on Saint Nicholas day. These are Dutch spice cookies very similar to a ginger snap. I have made these cookies and they are very good, but I didn't have the time to make them this year. Instead I opted to make a different spice filled item...Gingerbread pancakes. I liked them so much that I had them for dinner and dessert one day, and then used the rest of the batter to make some more in the morning. I was surprised to find that I much preferred the taste of the pancakes that I made for breakfast after the batter had been in the fridge overnight. The flavors and spices had a chance to really meld together and the result was a rich spicy pancake. I looked at a few recipes for inspiration and then added and changed some things. I really like deep, rich, molasses filled things when it comes to anything spice related...as in cinnamon, cloves, ginger, etc...
Gingerbread Pancakes
BY MOI

SIFT together in small bowl:

1 cup all purpose unbleached flour
1 tsp baking powder
1/2 tsp baking soda
1/2 tsp salt
1 1/2 tsp ground ginger
1 tsp cinnamon
1/8 tsp cloves

Whisk together in medium bowl:
4 TBS molasses
3 TBS agave,honey, or brown sugar
1/2 cup milk
1 cup plain or vanilla yogurt, or sour cream
2 TBS melted butter
1 egg
1 tsp vanilla

Mix dry into wet ingredients until combined. Pour onto hot buttered griddle. Wait until bubbles form on surface before flipping. Serve with warm maple syrup...or with warm maple pecan syrup...which is just maple syrup heated up with some butter and then add chopped pecans to it....so good.

*If you like a spicier pancake add 1 tsp fresh ginger chopped really small.
*You can make the batter the night before and store it in the fridge...easy breakfast!
*I added chocolate chips to some of the batter...also tres awesome!
*This recipe should make enough pancakes for 3-4 people...it all depends on what size the pancakes are and what size the people are : )
*Contrary to popular belief pancakes are not just a breakfast food...If I have my own family one day I plan on having pancake Wednesdays...we will have pancakes every Wednesday for dinner...how cool am I? : )

Friday, December 4, 2009

How to find a recipe...


It is snowing here in Texas. I must not be a true Texan because I am not freaking out over a few snowflakes. I am however craving tomato soup. I used to hate tomato soup, but then I had Panera's tomato soup and it was love at first bite. That will be my food project for the weekend - finding and making a yummy tomato soup. Usually when I decide I want to make something I search online for a recipe. Here are the websites I use and pull recipes from...


And of course check the food blogs that I follow...Smitten Kitchen, Eat Make Read, etc...

I used to check the food network website regularly, but wasn't having too much luck with those recipes. I do like the Barefoot Contessa recipes, Michael Charillo, and Alton Brown.

Tuesday, December 1, 2009

Maple Pecan Pie

One holiday down...three to go. I usually gage how good my Thanksgiving was by how tight my jeans are the next day. I was able to zip them up the day after, but then after we spent the next day eating the leftovers I opted for my sweat pants instead. When we travel for Thanksgiving I usually don't contribute too much to the meal. This year I made a bunch of pies, but nothing else. My favorite out of the 6 pies we made was the maple syrup pecan pie. Most pecan pies call for corn syrup, but I really wanted to avoid that if at all possible. The result was nice...sweet...and delicious. This pie will be making more appearances at our house. I recently quit my office job and am now working full time at a bakery, so...this will hopefully free up some of my time and I can test more recipes. My next venture is sweet potato bread pudding which should be served as a breakfast item with maple syrup...can't wait to make it!!

Here is the link for the maple pecan pie, thank you Williams and Sonoma!

My winter bird cake...isn't it cute? : )


Tuesday, November 24, 2009

Pie that I will be making...

Pie has never been something that I make on a regular basis. I think since it only makes sparatic appearances 2-3 times a year I have never spent much time searching for the perfect recipes. Making pie crust always seemed like it was scary and such a daunting task...but then I learned that it was not. After taking my cookies, pies, and tarts class I grew wicked confident about making pie and tart crusts. Now that I have cleared that hurdle the height doesn't seem so bad anymore. My now go to crust is posted below...I also like making this pat in pan crust from America's Test Kitchen...for those of you who dread the rolling pin that is a perfect recipe for you. I am currently in the mid-pie making process. My doughs are made and in their pans, my filling is chilling, and my decorations are set. Pie dough can be made weeks or even a month ahead of time. Simply make your doughs, roll out, and place in pans....be sure not to roll into glass pans if you are making ahead of time. Then cover the prepped pans lined with dough with plastic wrap and place in the freezer. When pie making day comes simply remove from the freezer, fill, and bake accordingly. You can freeze pies after they are baked with some recipes, but for best results wait until the day before to bake your pies. I wish I could share some of my favorite recipes, but since I don't really have any here are the ones that I am making this year...

Pecan:
Corn syrup free version from my teacher: http://www.eddyvandammeusa.com/2009/10/pecan-pie-corn-syrup-free/

Maple pecan pie: http://www.williams-sonoma.com/recipe/maple-pecan-pie.html?cm_src=oldlink

Pumpkin: http://smittenkitchen.com/2008/11/silky-smooth-pumpkin-pie/

Butternut Squash Pie: http://southernfood.about.com/od/pierecipes/r/r71128d.htm

Enjoy!

Pie in the sky,
Pie in the store I wouldn't buy,
Pie in my oven,
That's what I'll be lovin.

Monday, November 16, 2009

BEST pie crust ever...


BEST pie crust ever...
yield 3 single crusts
from On Baking

1 lb cold diced butter
1 lb 5 oz all purpose or pastry flour
1 TBS vanilla
4 oz buttermilk
2 tsp. salt
1 TBS sugar

The key to this recipe is to use super cold ingredients, and to not over mix. I make mine in a mixer because it is easier.

Chill mixing bowl and paddle attachment in fridge. Sift flour. Cut butter into small even square pieces, the size of peas. Place sifted flour into chilled bowl and start mixer. Throw butter piece by piece into flour until thoroughly combined and coarse like. In separate small bowl mix vanilla, buttermilk, salt, and sugar. Pour into the flour butter mixture...Mix for only 12-20 seconds until dough comes together. DO NOT OVER MIX! Remove dough from bowl and roll dough into a ball. Separate into three even portions. Cover with plastic wrap and chill thoroughly. When chilled roll out and press into pie pan.


corn syrup free walnut pie


This is what happens when pie is left unsupervised at my house...that is how good the crust is

Friday, November 13, 2009

The history of pie...did it fall from the sky?


I was curious about the origin of pie...I mean come on...do you really believe it fell from the sky? I think it is cool to see where the original ideas for food came from. I guess the cave men could have invented pie, I mean they did invent fire and the wheel, so I wouldn't put it past them to invent pie. I did some googling and came up with the following which is a paraphrasing of this article:

Guess what?
The first pies were called "coffins" or "coffyns". Isn't that ironic that pie season starts with the holiday of the dead in October...coincidence I think not. These pies were filled with savory meat and their crusts were tall, straight-sided and with sealed-on floors and lids. Open-crust pastry were known as "traps." Now in days this is referred to as a single crust pie. These meat pies had the crust itself as the pan, and it was tough and inedible. Man, were they missing out, I think the crust is the best part! The purpose of a pastry shell was mainly to serve as a storage container and serving vessel, and these are often too hard to actually eat. A small pie was known as a tartlet and a tart was a large, shallow open pie (this is still the definition in England).

Here is a recipe for how to make pie from back when your grandparents weren't even close to being born...

To Make Short Paest for Tarte - Take fyne floure and a cursey of fayre water and a dysche of swete butter and a lyttel saffron, and the yolckes of two egges and make it thynne and as tender as ye maye. (year 1545)

Say what?

Historians have recorded that the roots of pie can loosely be traced back to the ancient Egyptians. The bakers to the pharaohs incorporated nuts, honey, and fruits in bread dough, a primitive form of pastry. However, Historians believe that the Greeks actually originated pie pastry. The pies during this period were made by a flour-water paste wrapped around meat; this served to cook the meat and seal in the juices.

Nice marketing skills Mr. Cato, its all about the name, hello...

The Roman statesman, Marcus Porcius Cato (234-149 B.C.), also know as Cato the Elder, wrote a treatise on agriculture called De Agricultura. He loved delicacies and recorded a recipe for his era's most popular pie/cake called Placenta. They were also called libum by the Romans, and were primarily used as an offering to their gods. Placenta was more like a cheesecake, baked on a pastry base, or sometimes inside a pastry case.

And I thought Mincemeat was sick...

13th Century recipe for pie: Tortoise or Mullet Pie - Simmer the tortoises lightly in water with salt, then remove from the water and take a little murri, pepper, cinnamon, a little oil, onion juice, cilantro and a little saffron; beat it all with eggs and arrange the tortoises and the mullets in the pie and throw over it the filling. The pastry for the pie should be kneaded strongly, and kneaded with some pepper and oil, and greased, when it is done, with the eggs and saffron.

...what is a mullet and a murri you ask? A mullet is a boney fish with a stout body...and a murri is a thick saltly soy sauce like sauce used to flavor dishes.

This is funny...

1626 - Jeffrey Hudson (1619-1682), famous 17th century dwarf, was served up in a cold pie as a child. England's King Charles I (1600-1649) and 15-year old Queen Henrietta Maria (1609–1669) had a party and at the dinner, an enormous crust-covered pie was brought before the royal couple. Before the Queen could cut into the pie, the crust began to rise and from the pie emerged a tiny man, perfectly proportioned boy, but only 18 inches tall named Jeffrey Hudson. Hudson, seven years old the smallest human being that anyone had ever seen, was dressed in a suit of miniature armor climbed out of a gilded pastry pie stood shyly on the table in front of the Queen and bowed low. Hudson was later dubbed Lord Minimus.

I think I might try this one this year...

RECIPE FOR NEW ENGLISH PIE - To make this excellent breakfast dish, proceed as follows: Take a sufficiency of water and a sufficiency of flour, and construct a bullet-proof dough. Work this into the form of a disk, with the edges turned up some three-fourths of an inch. Toughen and kiln-dry in a couple days in a mild but unvarying temperature. Construct a cover for this redoubt in the same way and of the same material. Fill with stewed dried apples; aggravate with cloves, lemon-peel, and slabs of citron; add two portions of New Orleans sugars, then solder on the lid and set in a safe place till it petrifies. Serve cold at breakfast and invite your enemy.

TaDa...the abridged version of pie History!

FYI-I plan on making pie this weekend, I also plan on posting a pie recipe...but as we all know the best laid plans of mice and men often go astray...good thing I'm not a mouse or a man : )


Thursday, November 12, 2009

1,000 hits!

1,000 hits on my blog! Congratulations to me! I guess some people do read my blog even though they aren't very good at leaving comments... : ) I love food, cooking, and more importantly - Baking. I hope my little blog inspires some of you to get in the kitchen and make the world a better place...one cookie at a time.

Thanks for reading!
Dagny

Tuesday, November 10, 2009

Browned butter chocolate hazelnut cookies

I made cookies this weekend for a memorial service and they were good. I was shuffling through the madness known as our kitchen cupboard and came across a bag of hazelnuts. Why we had them I am not sure, but it was fate that I found them. I decided to make my new favorite chocolate chip cookie recipe from Alton Brown and use the hazelnuts instead of walnuts or pecans. They were insanely good, and everyone loved them! I thought they were good, but next time I plan on browning the butter and toasting the hazelnuts before I bake them. I just read that you have to toast nuts before mixing them into things, because once they are combined with other ingredients they don't toast and achieve their full toasty nuttiness.

Among other things my new life mission is to convince nutella that they need to develop a nutella chip. How awesome would that be. Who cares about Health care, this idea is where Americans will find happiness.

Browned Butter Chocolate Hazelnut cookies

2 sticks browned unsalted butter
2 1/4 cups bread flour
1 teaspoon kosher salt
1 teaspoon baking soda
1/4 cup sugar
1 1/4 cups brown sugar
1 egg
1 egg yolk
2 tablespoons milk
1 1/2 teaspoons vanilla extract
1 cup toasted hazelnuts
1 1/2 cups milk chocolate chips

Directions
Toast hazelnuts...read how here: http://www.ehow.com/how_15912_toast-nuts.html
Heat oven to 350 degrees F.
Brown the butter in a heavy-bottom medium saucepan over medium heat. For more specific directions read this: http://allrecipes.com/HowTo/Browning-Butter/Detail.aspx Sift together the flour, salt, and baking soda. Add cooled hazelnuts and chocolate chips and toss together. Set aside.
Pour the browned butter into the mixing bowl. Add the sugar and brown sugar. Cream the butter and sugars on medium speed. Add the egg, yolk, 2 tablespoons milk and vanilla extract and mix until well combined. Slowly incorporate the flour mixture until thoroughly combined.
Chill the dough in fridge for about 1 1/2 hours, then scoop onto parchment-lined baking sheets. Bake for 10-13 minutes or until slightly golden brown, rotating the pan after 6 minutes. Cool completely and store in an airtight container.

Tuesday, November 3, 2009

Sugar and Spice cookies

Marzipan pumpkin I made...love it.


Oh my goodness...how I do love the FALL! I fall asleep dreaming of cinnamon, nutmeg, ginger, allspice...and cardamon...oh boy! I have been on a mad hunt for a wicked good chewy ginger spice cookie. My friend who is awesome...and yes she knows it : )...came to my rescue. The recipe she gave me is from America's test kitchen, which is a cookbook that is missing from my collection...that problem will hopefully be remedied by Christmas...hint hint. As soon as she said it called for pepper, I knew I was in for a treat! This is a great recipe! Instead of rolling them in plain white sugar I rolled them in turbinado...or raw sugar...this made the outside of the cookie pretty and crunchy! I have also made pumpkin brownies, pumpkin pancakes, and browned butter chocolate chip cookies in the last few days...tres awesome.

Among other things I came to the realization that I am not as funny as I used to be. I mean, I think I am funny, and I often find myself laughing to myself about things I have said or thought...I crack myself up...but I have realized that my writing has been lacking in the funny department. I hereby promise to be more funny when it comes to my blog. Of course this change will not occur until the next post because I honestly can't think of anything funny to say.

Molasses Spicy Cookies!
Courtesy of America's Test Kitchen

1/3 cup granulated sugar
2 1/4 cups all purpose flour
1 tsp. baking soda
1 1/2 tsp. cinnamon
1 1/2 tsp. ginger
1/2 tsp/ cloves
1/4 tsp. allspice
1/4 tsp. salt
1/4 tsp. pepper
1 1/2 sticks unsalted butter
1/3 cup brown sugar
1 egg yolk
1 tsp. vanilla
1/2 cup molasses
1/2 cup-1 cup turbinado (raw sugar) for rolling

1. Preheat oven to 375
2. Cream butter and brown sugar 3-4 minutes. Beat in egg yolk, vanilla, and molasses.
3. In separate bowl sift together the dry ingredients, including the granulated sugar. Mix into the wet until combined.
4. Scoop out and roll in raw sugar.
5. Place on parchment lined baking sheet.
6. Bake 10-12 minutes. If you over bake them they will be crunchy. They will still be soft when you pull them from the oven, but worry not, when they cool they will stiffen up.

Thursday, October 22, 2009

Cheddar Cheese Scones!!!


Yum. Cooler weather has arrived and with it comes the craving for soups and stews of all different varieties. Chili is a must make during the fall, and of course cornbread to go with. However, I came across a jalapeno cheddar scone recipe on another food blog I follow that sounded like it would be good with chili. I know how picky my family is about their food so I made 1/2 the recipe with jalapenos, and the other 1/2 without. My brother was the only one who liked the spicy jalapeno ones, but everyone else loved the plain cheese ones. I loved them so much that I have made them twice in 5 days! The key to all biscuits and scones is to not over mix! Over mixing makes them become tough and dense...where is the ideal texture is light and flaky. This original recipe called for rolling the dough out and cutting it with a biscuit cutter, but that sounded too ambitious for my tired overworked self, so I just scooped and dropped instead...way easy, and way bueno. These are wicked fast to make, I literally whipped up the dough in less than 10 minutes...and they baked really fast as well!

original recipe from Smitten Kitchen Blog:
http://smittenkitchen.com/2009/10/jalapeo-cheddar-scones/#more-5058

Cheddar Cheese Scones
adapted by moi.

- 2 cups all-purpose flour
- 1 tablespoon baking powder
- 1 teaspoon salt
- 8 tablespoons (1 stick or 4 ounces) cold butter, diced
- 1/2 cup heavy cream
- 2 eggs
- 1/4 pound sharp Cheddar cheese, diced*

Preheat oven to 375°F. Combine the 2 cups of flour with the baking powder and salt. In separate bowl toss diced cheese with 1 TBSP of the flour/baking powder/salt mixture. Cut the butter into the dry ingredients with a pastry blender, fork or blend in stand mixer with paddle attachment until the butter bits are pea sized. Lightly whip the eggs and cream in a small bowl and add to the flour-butter mixture. (reserve the bowl and any egg/cream mixture that is left on the sides) Using a wooden spoon, fold mixture only until it begins to come together. Add the cheese to the dough and mix only until everything is incorporated. Scoop out scones with medium ice cream scoop onto parchment lined or oiled cookie sheet. Flattened slightly with palm of hand. Brush the scones with egg/cream remnants from small bowl. Bake for 7 minutes and then rotate pans, and then bake for 5 more minutes or until golden brown.

*I used extra sharp Vermont White from Cabot....very delicious!


A food history lesson: Taken from Wikipedia.

While I was writing this post the question popped into my wee little brain...what the heck is the difference between a biscuit and a scone?

A biscuit (pronounced /ˈbɪskɨt/) is a kind of small, flat-baked bread product that is usually made with a chemical leavener such as baking powder. The origin of the word "biscuit" is from Latin via Middle French and means "cooked twice". Some of the original biscuits were British naval hard tack; such hard tack was made in the United States through the 19th century. Throughout most of the world, the term biscuit still means a hard, crisp, brittle bread, except in the United States and Canada, where it now denotes a softer bread product baked only once. The word 'biscuit' transliterated into Russian or Ukrainian has come to mean 'sponge cake'. Biscuits have a firm browned crust and a soft interior, similar to British scones or the bannock from the Shetland Isles.

The scone is a small British quickbread (or cake if recipe includes sugar) of Scottish origin. Round-shaped British scones can resemble North American biscuits in appearance, but scones rely on cold butter for their delicate, flaky texture, while biscuits are more often made with shortening and are crumbly rather than flaky. Also, while scones are served with coffee and tea or as a dessert, biscuits are served more as a side bread often with breakfast.[7] In Scottish language the verb scon means to crush flat or beat with the open hand on a flat surface, and "scon-cap" or "scone-cap" refers to a man's broad flat cap or "bunnet".

After reading a few articles I found my answer here:
http://www.suite101.com/lesson.cfm/17731/1115

Question:
What is the difference between biscuits and scones? They use basically the same procedure to arrive at two different kinds of baked goods.

Summarized answer:
The main difference between biscuits and scones is that scones tend to have eggs and are sweeter and more elaborate, while biscuits don’t include eggs and have simpler, more savory ingredients. That doesn’t mean a biscuit has to be plain. It’s just that biscuits are more likely to have cheese or fresh or dried herbs in them rather than, say, currants or chocolate chips. Biscuits are also more likely to be served with a meal than as a dessert or tea item, which explains their savory nature.

Consider yourself educated.

Friday, October 9, 2009

Fall Fest Take 2...


You know when you see a car on the road with a dog sticking his head out the window, with his ears flapping in the wind, and the biggest dog smile on his face? That makes me happy. On a completely different note...

I participated in my second Church Fall Festival last weekend. What an ordeal and an operation....let me tell you. This time around I was determined to be more organized, more professional, more efficient, and basically more successful than last year...and I was. Last year I did fairly well for 6 hours of cookie selling with about $500 in sales...that's a lot of cookies. I way over baked though, and even though I had a steady stream of customers I had a lot of product leftover. The festival this year was a 2 day ordeal in a better location, with the promise of a huge turnout. Unfortunately the weather didn't feel like cooperating with me this year and it was overcast all day Saturday, and then monsooning all day Sunday...which means people stayed home where it was dry. Fortunately, the Church was so kind and found places inside for all of their outdoor vendors on Sunday. Still, the crowd wasn't very large because the bad weather. My motto going into this was "sell out or go home" - I was sure I would sell out this year. I started out with low sales, but then my wonderful family rallied and whipped out their mad crazy sales skills and boom-we were rocking it! Considering the size of the crowd we did really well with about $950 in sales, and less leftover product than last year. Go us! My favorite part about selling my stuff is the look on peoples faces when they bite into something, and then when they come back and buy more! Here are a few memorable things that happened...

1) My 5 year old niece jumped in and walked around with samples for people - it was so cute, and she got so many people to come buy stuff from us...her line was "Isn't it good? No I didn't make it, you can go buy some over there from my aunt." She had a blast...and I don't think I was breaking any child labor laws. : )

2) One older dude kept coming back to my tent - about 4 times to buy stuff...his comment about my heaven bars to another customer was, "I am old, and if I had died without getting the chance to eat this heaven bar, I never would have truly lived." : ) I almost cried : )

3) A middle aged lady came to my tent 6 times! Each time she brought someone new with her and got them to buy stuff from me as well! Talk about a dedicated customer!

4) My younger sisters and one of their friends helped me out so much - two of them were my support throughout the three day ordeal helping me set up and tear down, another one jumped in mid day and really upped my sales...she is a wicked good salesperson even though she doesn't think she is. My mom was my baker and on Friday she baked all my cookies off for me, 9-7 baby! My older sister and her husband made me beautiful business cards that are hip, and cool, and awesome...very awesome!

5) At the end of the day my neighboring vendor had already bought two bags of cookies from me and offered to trade me 3 pairs of earrings for another bag...boo yah baby, and free earrings for me!

Overall, I had a good time, and I realized 3 things.

1) If you offer something different then your regular run of the mill chocolate chip cookie - people will be interested...if it is good, they will buy it, and then come back for more!

2) I really can't do this alone and definitely need a business partner who is better at numbers than I am.

3) I really am good at what I do, and I love making people happy with just one bite. : )

the end.


Tuesday, October 6, 2009

Chicken Soup Weather...


Recently the weather changed here in Texas...I guess you could say we got a cold front, but really...it's not that cold. Anyway, we were all feeling yucky -congested and sore throaty, so I decided to make a big batch of my chicken soup. Now this is not an exact recipe, I just throw stuff in a pot and hope for the best, so its more like an idea that you can take and roll with it.


1-rinse a whole chicken. Place into a pot and cover with water. Add a few tsp.s of salt. Boil water and cook until chicken is falling off the bone- this usually takes a good 35-55 minutes depending upon the size of your bird. You can also roast, grill, or bake the chicken if you like. I like to boil the chicken because it is less pots and then I also make chicken broth at the same time.


2-while your bird is boiling away...cut up whole carrots - I keep the skin on because that is really where the nutrients are, and I cut my carrots into disks. Then I dice a bunch of onions and celery. I like to saute my vegtables in coconut or olive oil first for a few minutes to achieve a nice carmelization...I do this in a large saute pan.


3-when the chicken is cooked remove it from the water and allow it to cool on the counter. Meanwhile add a few cups of wild rice to the chicken water, and return to a boil Add a few tsps. of better than boullion chicken paste and cover pan.


4- While the rice is cooking prep the chicken. Remove the skin and bones and shred the chicken or tear into peices with you hands. Return to the chicken/rice/ water.


5- After the rice has been boiling for 15 minutes add the chopped up and sauteed vegtables to the pot. Continue to cook until rice is cooked and vegetables are tender. Add seasoning accordingly. I usually just do salt, pepper, oregano, garlic, and little bit of cayenne pepper.


Chicken soup is so versatile and awesome. You can use different meat, different vegetables-squash, cabbage, green beans, asparagus, shallots, kale, bok choy - yeah, pretty much anything works. You can also use different grains -pasta, quinoa, barley, white/brown rice, risotto...yeah-it all tastes good.


I am also curious to hear what other people's cold remedies are...if you have any please let me know what they are.


When we get colds or are sick we OD on vitamins - Vitamin C, Echinacia, silver...etc. Also, I make a drink concoction of 2 TBS apple cider vinegar, 1 tbs honey, 1 tbs lemon juice, and 1 cup boiling water. It tastes awful, but really helps. Any other crazy ideas out there?

Thursday, September 17, 2009

Off day...


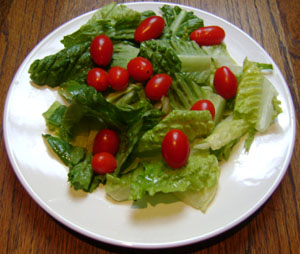
Do you ever have those days when you get home wicked late and all you want to eat are some nice fresh vegetables? Yeah, I normally don't get that craving, usually I crave meat and sweet at the end of a long work day, but this week was different. I arrived home to an empty house on a Tuesday night at about 9:30pm...we had plenty of good food options, and temptations lying around, but all I wanted was a nice leafy green salad with tomatoes, and by George that's exactly what I ate. It was perfect and I went to bed feeling healthy.


Someone once told me that what you crave the most is probably what your system already has too much of, and that you should reject that craving and choose something from a different category. My number one craving is grains, always wanting the grains. Darn the grains. Sweets comes in a close second. Darn the sweets. I try to have as many fruits and veggies as I can possibly cram into a day, but it is hard. The vegetables are the hardest. On a good day I have veggies at lunch and dinner, but usually only at dinner. I usually have fruit twice a day - no problem. I did the whole fresh carrot sticks thing for a while, but got sick of that after about 6 months...plus if I didn't have hummus or dressing to dip it in I wouldn't eat it. I do like fresh green beans blanched, they are portable for my crazy schedule and are yummy. I just cook them in boiling salted water for 1-2 minutes and then strain and cool them off under cold water.

Hum...maybe I should invent vegetable candy - vegetables that have been condensed and smushed into interesting and convenient shapes...hum Lettuce lollipops anyone?
Bad joke of the day: What did the salad say before grace? Lettuce pray!

Tuesday, September 1, 2009

Chocolate Creams with Port and dried cherry sauce...tell me that doesn't sound incredible!


After much thought and consideration I have decided to approach the US government and demand that Sweets be moved from the top of the food pyramid. How come they got totally gypped? They totally have the smallest section on that darn pyramid...Maybe that's what is the matter with our society today, they don't have enough sugar in their diet. Yeah right. Seriously, it is wonderful.


I don't usually make fancy desserts. Mostly because we just ain't fancy people. Also, cookies are like pennies to my family...you know when you are little and someone gives you bunches of pennies and you think you are so rich? Its the same thing with cookies - my family thinks they are so lucky to have all those cookies...but when I stick one nice fancy dessert in front of them they don't get all excited, they just want their pennies back. Yeah, we are that kind of weird.


Regardless, I decided to make something fancy. My parents just celebrated their 29th wedding anniversary and in honor of that my sister and I made a nice meal for them. We made teriyaki chicken and shrimp kebabs with lots and lots of veggies over a bed of wild rice risotto. Then topped it off with chocolate creams with a port and dried cherry sauce - absolutely Divine. Maybe they should have an anniversary everyday. : )
Step one: Prepare to be awed.
Step two: Grab and scale out the ingredients for the chocolate creams.
Step three: Follow this recipe

Chocolate Creams:
Adapted from Chef Eddy

1 3/4 cup (14oz) of Milk (I used whole milk)
1 cup (8oz) Heavy Cream
4 Egg yolks
1/3 cup + 1 TBS (3oz) granulated sugar
2 1/2 cups (15 oz) Chocolate chunks or chips (I used 10oz semi sweet, and 5 oz milk - it all depends on what kind of chocolate you like)

Bring the milk and cream to a boil in a saucepan on the stove top over a medium high heat. Meanwhile, in a separate bowl whisk the egg yolks and sugar until well combined. It is important to whisk quickly at this point because once sugar and egg yolks meet they tend to clump - so, continuously whisk until the milk and cream mixture is boiling. Temper the yolk mixture by slowly adding a fourth of the milk/cream mixture to the sugar/yolks in the bowl. Whisk fast. Return the yolk and milk/cream mixture to the rest of the milk/cream in the saucepan. Heat until temperature reads 183 degrees- whisk constantly...it is best to use a thermometer, but if you don't have one this took about 2 minutes over a medium high heat. Remove from heat and cool to about 140 degrees. Whisk in the chocolate until melted and mixture is smooth. Pour into individual ramekins or glasses. Cover and refrigerate at least 5 hours until mixture is firm and set. You can make these a few days ahead of time if you need to.

Step four: Make the Port sauce...oh boy...are you ready for this?

Chocolate Port Sauce with dried Cherries
Adapted from Chef Eddy

1 cup (8oz) Port (I ran out of port and used 1/2 Merlot and 1/2 port - it still came out awesome, but all Port is always better)
1/4 cup + 1 TBS (2oz) granulated sugar
1/3 cup dried cherries cut in half
2 TBS (1 oz) bittersweet chocolate

In a saucepan bring the port and sugar to a boil. Add the dried cherries. Simmer and reduce until mixture slightly thickens. This takes about 5 -7 minutes...keep watch though and makes sure it is not at a full rolling boiling. Remove from heat and whisk in the chocolate. This sauce is syrupy in consistency. Serve warm over the chocolate creams or just eat it with a spoon and you will be happy. I had some leftover sauce and kept it in the fridge overnight and heated it up the next day and it was still awesome.

To learn more about Port wine...which is a dessert wine read this: http://en.wikipedia.org/wiki/Port_wine

Marinade for Chicken or Beef...I made them into Kebabs.


We made these at school last Fall...the ones my group made didn't turn out so hot...the soy sauce we grabbed off the shelf was some weird brand with flour added to it and had expired a way long time ago...but all of the other groups came out really yum. The recipe is originally for a London Broil.

I cut up boneless skinless chicken thighs and let them soak in the marinade in the fridge for about 5 hours. They were D-licious!

1/2 cup soy sauce
1/3 cup dry sherry ( I used Merlot because we didn't have sherry and it worked out just fine)
1/3 cup brown sugar
1/4 cup vinegar
2 TBSP vegetable oil
2 cloves garlic minced
1/2 tsp. ground ginger
1 small chopped onion

Enjoy!

Tuesday, August 25, 2009

Peanut Butter Cookies...sans the refined sugars

Recently I have been off the hook baking like crazy. It is a good thing because a) I am trying all these new recipes b) I get to enjoy the fruits of my labor c) I get to make other people happy with my creations. It is a bad thing because a) I feel over fed b) I am giving into my awful addiction of being enslaved by the power of sugar, and c) Most importantly, my jeans are tight...again.

I have found that when I bake without using refined sugar and brown sugar I tend to want to eat less of what I have made. I think this is because sugar truly does have an addiction quality and once you have a little your body craves more and more of it. I have had a lot of positive results using agave as a refined sugar substitute, but now I have a recipe that uses maple syrup instead of refined sugar. I have been wanting to make peanut butter cookies for some time now, and was glad to finally have the chance this weekend. When I was younger it was a rare occasion if we could afford to splurge and buy a bag of chocolate chips, but something we always had on hand was a huge tub of peanut butter. I always made the same recipe from the talk about good cooking Louisiana cookbook - and old family cookbook whose binding was falling apart and many of the pages had already fallen out. It was always hard to find any recipe in that book because some of the pages that had fallen out had included most of the index. The cookies always turned out flat and hard, but still I continued to make then. Now that my "cookie skills" have improved I plan on trying out that recipe again...hopefully with better results!

Peanut Butter cookies
adapted from 101 cookbooks

2 cups whole wheat flour, spelt flour, or unbleached all-purpose flour (I used white wheat flour)
1 teaspoon baking soda

3/4 teaspoon fine grain sea salt
1 cup organic, chunky natural peanut butter (you could also use almond butter)
1 cup maple syrup
1/3 cup extra virgin olive oil
1 1/2 teaspoons vanilla extract
3/4 cup chocolate chips (optional)

Preheat oven to 300F degrees. In a medium mixing bowl combine the flour, baking soda, and salt. in a separate larger bowl combine the peanut butter, maple syrup, olive oil, and vanilla. Stir until combined. Pour the flour mixture over the peanut butter mixture and stir until barely combined - still a bit dusty looking. Drop by heaping tablespoonfuls onto parchment-lined baking sheets. Press down on each one gently with the back of a fork. Bake for 12, maybe 14 minutes - but don't over bake or they will be dry. Let cool five minutes and transfer to a cooling rack.

* The original recipe called for baking the cookies in a 350 degree oven, I have recently been baking my cookies on a lower temperature for a longer amount of time and have been having excellent results. These cookies looked like they needed more time in the oven, but I pulled them out anyway and after they cooled they were perfect.

Enjoy!

Friday, August 21, 2009

How to get the most juice from citrus without a special machine or tool...

First of all, I would like to just say that citrus is not something I use a lot of. In fact, as a general rule I avoid it. If someone brings me a glass of water with a lemon in it I quickly fish it out before it can contaminate my water too much. When life gives you lemons most people make lemonade, I usually put them on the counter and wait for them to rot and then throw them away...put that on a bumper sticker! : ) I don't like to use it in things I bake, but I do use it in my marinades and salad dressings from time to time.

Last semester while we were making lime curd we were instructed in the ways of "properly" juicing citrus.

1. Citrus always juices better when it is warm or at room temperature. It is hard to juice citrus straight from the fridge, or even freezer : ) Not that any of you put your citrus in the freezer.

2. People like massages and so do citrus. By rubbing it against the counter you are releasing some of the tension and knots that have built up in the fruit - yes, it is stressful to be a citrus -you try living your life on a tree, then maybe lying helpless on the ground, and all you have to look forward to is ending your life by being squeezed and cut. Poor little guys.

3. Cut your citrus into 3 slices. Most people have been trained to cut the citrus in half and then scoop and squeeze the heck out of it. By cutting it into 3 pieces it makes it easier to reach all those hard to get to places.

4. Squeeze each slice until it is dehydrated. Yippee! Your citrus is now juiced, please pass go and collect $200.00.

Monday, August 17, 2009

My new granola recipe : )


As a general rule I try to make three new recipes every week. This week I made cream cheese brownies, oatmeal chocolate chip cookies, and then granola. I guess I cheated, because granola is not a new recipe for me. I used to make my granola with butter...which is why it tasted so good...but have begun to use coconut oil and olive oil instead. I only changed things up because I was craving granola and was plum out of butter. I like both of my recipes, but this new one has a special place in my heart now. I usually make up a big batch every Sunday evening and then eat it for breakfast throughout the week. It is very filling, so you don't need to eat a lot, and it keeps me satisfied until lunch time. My favorite way to eat it is with almond milk in my little colorful one cup ice cream bowl...it makes me feel very tres chic : ) Ironically, the New York times recently had a post about granola made with olive oil...I swear I just read that article day : )
Enjoy!

Olive oil Coconut granola:
from my lab to yours...

1/2 cup coconut oil
1/2 cup olive oil
1/2 cup agave nectar
1/2 cup honey
1 TBS Vanilla
1 tsp cinnamon
6 cups old school/old fashioned oats
1 cup chopped almonds (I use the blanched slivered ones, but I have also used the salted and roasted whole kinds roughly chopped - both work out yummy)
1 cup unsweetened coconut (shredded or flaked)

In large sauce pan heat the oils, agave, honey, vanilla, and cinnamon, until combined and the coconut oil has been broken down - no longer clumpy. Usually takes only a minute or two. Stir in the rest of the ingredients until well combined. Spread out evenly onto a pan - I use a really large rectangle cake pan. Bake in 300 degree oven for 20-30 minutes, stirring every 10 minutes until golden brown. Remove from oven, cool, eat. I usually toss in some raisins after it has cooled down.

Enjoy!

Monday, August 10, 2009

Cannolis, non-traditional style : )

Growing up one of my first recipes to make was from the Nestle Toll house recipe book. Little did I know that this would become one of my most favorite things to make. This is not your traditional cannoli filling recipe...in fact it is very different. It is quite simple to make, and something "different" to have for dessert.

According to Wikipedia..."Cannoli, (plural) in Sicilian, are Sicilian pastry desserts. The singular is cannolo (or in the Sicilian language cannolu), meaning “little tube”, with the etymology stemming from the Latin "canna", or reed."

Cannoli filling:
Adapted from The Nestle Toll house cookbook

1 cup milk chocolate chips
15 oz. ricotta cheese
6 oz. cream cheese at room temperature
2 tbs confectioners sugar
1 tsp vanilla

Melt chocolate chips and set aside. I like to melt chocolate chips in the microwave at 50% power for 2-3 minutes.

In bowl cream ricotta with mixer until smooth. Add cream cheese and cream until smooth. Add rest of ingredients, and melted chocolate chips, and blend until smooth. Tastes best after being refrigerated for at least 4 hours.

I usually buy the pre made shells at the grocery store. Alessi makes a good shell. I have tried to make my own shells, but haven't had much luck with that. I fill the shell with filling and then dip one end in chocolate chips, and the other in crushed up pistachios, then sprinkle with powdered sugar.

If you can't find shells, this also makes a nice fruit dip. I have been trying to come up with a thin cracker like cookie that can be dipped in the filling....when that happens, I will post it!

Enjoy!

Thursday, July 30, 2009

BROWNIE PUDDING

I have been working lots and lots of hours, and haven't had much time to cook, bake, or write. The times I have baked I have made a regular version of a recipe and a gluten-free, agave sweetened version at the same time - so I can compare and contrast. I made this recipe for Ina Garten's brownie pudding - it was so good, both versions. I seriously couldn't decide which one I liked better. First is the flour and sugar version. This came out nice and yummy. It was almost like eating brownie dough, but it was cooked...very yummy. It doesn't hold its shape...so don't be surprised when you go to slice it and all you can do is spoon it.


Brownie Pudding
Adapted from Ina Garten
Serves 6
1/2 pound (2 sticks) unsalted butter, plus extra for buttering the dish
4 extra-large eggs, at room temperature
2 cups sugar
3/4 cup good cocoa powder
1/2 cup all-purpose flour
1 tsp. vanilla


1. Preheat the oven to 325 degrees F. Lightly butter a 2-quart (9 by 12 by 2-inch) oval baking dish. Melt the butter, and set aside to cool.
2. In the bowl of an electric mixer fitted with the paddle attachment, beat the eggs and sugar on medium-high speed for 5 to 10 minutes, until very thick and light yellow. Meanwhile, sift the cocoa powder and flour together, and set aside.
3. When the egg and sugar mixture is ready, reduce the speed to low and add the vanilla and the cocoa powder and flour mixture. Slowly pour in the cooled butter, and mix again just until combined.
4. Pour the brownie mixture into the prepared dish, and place it in a larger baking pan. Add enough of the hottest tap water to the outside pan to come halfway up the side of the dish; bake for 1 hour. The center will appear very under-baked; this dessert is between a brownie and a pudding.
5. Allow to cool and serve with vanilla ice cream.


The gluten free version was more sturdy and came out more as an actual brownie and not pudding. Still, it was excellent, and delicious! Follow the same prep instructions, except don't beat the eggs and agave for a long time - they will never fully mix.


Brownie Pudding (Gluten-free, agave sweetened)


1/2 pound (2 sticks) unsalted butter, plus extra for buttering the dish

4 extra-large eggs, at room temperature

1 cup agave nectar

3/4 cup good cocoa powder

1/2 cup gluten free flour or baking mix (I used Bobs, or Pamela's brand)

1 tsp. vanilla


I was inspired to write last night after working all day at the bakery...ENJOY!


The Life of a baker:


I scoop, measure, and pour,

Now I know what my hands are meant for,

I sift, stir, and blend,

Will my mixer last until the end?

I scrape, flip, and fold,

Mixing up concoctions that are so bold.

I portion, shape, and chill.

Wait until my guests see their bill.

I heat, rotate, and bake,

This is not your ordinary Patty-cake.

I cool, remove, and store.

Who on earth thought baking was a bore?

I plate, serve, and wait...

What is the verdict, what is my fate?

I sigh, smile, and am thankful,

That my creation is so wonderful!

Monday, July 13, 2009

Agave Ice cream

A life lived without refined sugar is a life half lived. I am on the fence with this one. I have found in my trying to bake with agave instead of refined sugar that yes, some recipes turn out great, and no - some do not turn out so great. I just returned from a 2 week vacation to my island in South Carolina...I really didn't cook or bake too much which is weird. I did however make lots of ice cream with my new ice cream maker. I made different batches - some with sugar, and some with agave. To my surprise the agave ice cream was liked the most. This is a standard, basic, foundational recipe for agave ice cream...you can play with it - add mint extract, add fruit, add cookies or brownies, add nuts, top with granola...anything your little heart desires.

Agave Ice Cream
Makes 1 quart

1 Cup Milk
1/2 Cup Agave
1 Tablespoon Vanilla
Pinch of salt
2 Eggs
2 Cups heavy cream or half and half

Place milk, agave, vanilla, and salt in a medium saucepan. Heat at a low temperature for 7-10 minutes. Mix in the eggs and stir lightly until slightly thick. When cool, stir in the cream. Chill in fridge until no longer warm. Add this mixture to your ice cream maker and follow the manufacturer's directions to make deliciously healthy ice cream with Agave! Add in fruit or chocolate for different varieties!

Saturday, June 13, 2009

A new kind of Chicken that is darn good and finger licking!

Yes...I know what you are all thinking..."Does this girl have a food group besides chocolate?" I promise I do. We are always looking for a quick way to fix chicken during the busy chaos of the week. Surprisingly we...or should I say, my mom, found this recipe in the yeast free binder our Dr. gave us. We were all shocked and surprised when my mom was able to cook something all by herself ...and here's the kicker...it was good...second helping good. She loved all the compliments and praise we gave her she has now made it over three times in the last 2 weeks! This recipe is simple and good. It is best to marinate it 2-4 hours before cooking...or even over night, but if you don't marinate it - it still tastes good. The way you cook it is also up for interpretation. Thus, I now present to you...my mother's weekday chicken recipe!

1 1b. boneless chicken (we like thighs, but it also worked well with breasts)
6 Tablespoons sesame or coconut oil
1 Tablespoon salt
1 Tablespoon ground black pepper
2 lemons juiced
1 medium onion chopped small
1 Tablespoon ground cumin

Mix all ingredients together and marinate as long as you like. We cooked it in a skillet on the stove top. You can also grill it. You can serve it over rice. If you want to up the healthy factor you can add some fresh spinach after the chicken is cooked and wilt, then serve over rice. This is different, but it is good. Hope you enjoy!

Thursday, June 4, 2009

Brownies. Can this be love?


Oh how I love brownies. Oh how I miss brownies. Let me count the ways. During the last 3 weeks of my awful detox diet - to which I have proudly stayed the course - I have not baked. I don't know what is worse - not baking, or not eating. Anyway, I had to break my baking fast last night in order to bake a bunch of things for a party we are having at our house tonight for 70 people. We are having a rocking awesome crawfish boil and we needed some nice comfort food desserts to go with. I decided to make a few trays of my previously posted "Heaven bars", a few trays of some oatmeal raisin bars, and then some old school brownies. Everything looks wonderfully scrumptiddlyocious! I regret to say that I had to break my fast minimally in order to taste the brownies...after all, I don't want to serve my guests bad food - it needed to be tested. All it took was my one little bite and I knew...it was love at first bite! The perfect brownie. It was chewy, yet fudgy. Sweet, but not teeth wrenching. Melty, but firm. In other words...OFF THE HOOK! This recipe comes from the infamous Ina Garten - one of my mentors in recipe creating -I love how she makes simple things beautiful and impressive. I adapted the recipe slightly only because I didn't have enough of one kind of chocolate chip, and I went sans the nuts...mostly because we didn't have any, but also because they are expensive. I am sure my guests will be thrilled, as I hope you are!

Outrageous Brownies
adapted from Ina Garten


Ingredients:
1 pound unsalted butter (4 sticks)
1 pound plus 12 ounces semisweet chocolate chips, divided (I used a combination of semi-sweet, milk, and white chocolate chips)
6 ounces unsweetened chocolate (I used the BAKER chocolate squares)
6 large eggs room temp
3 tablespoons instant coffee powder
2 tablespoons real vanilla extract
2 1/4 cups sugar
1 1/4 cups flour, divided- 1 cup for batter and 1/4 cup in the chips
1 tablespoon baking powder
1 teaspoon kosher salt

Directions

Preheat oven to 350 degrees F. Grease and flour a 13 by 18 by 1 1/2-inch sheet pan.
Melt together the butter, 1 pound chocolate chips, and bitter chocolate on top of a double boiler...or in a microwave safe bowl in the microwave. Cool slightly. Stir together the eggs, instant coffee, vanilla and sugar. Stir in the warm chocolate mixture and cool to room temperature.

Stir together 1 cup of the flour, baking powder and salt. Add to cooled chocolate mixture. Toss the chocolate chips with 1/4 cup flour to coat. Then add to the chocolate batter. Pour into prepared pan.
Bake for about 30 minutes, or until tester just comes out clean. Halfway through the baking, rap the pan against the oven shelf to allow air to escape from between the pan and the brownie dough. Do not over bake! Cool thoroughly, refrigerate well and cut into squares.

Detox update: It is going well. The first 2 weeks were the hardest...headaches, shaking, anger at carbs : ). Now, it is not so bad. I no longer find myself dreaming about bread and cookies - I even went to class and wasn't tempted to eat all the stuff we made. Weird. On the plus side - I have lost a lot of weight! I haven't actually weighed myself, but as far as the jean test goes - I now fit into my jeans that I haven't fit into for over a year and a half! Sweet! I plan on sticking with this until I get to SC - so only 3 weeks left!

Sunday, May 24, 2009

Homemade Chocolate Chips

So my mom, little brother, and I are doing this yeast detox diet for 28 days. All I can say is...this is the closest to hell I have ever been. I have decided that a life lived without wheat, dairy, and sugar is not a life at all. I fully intend to stick to my 28 day commitment, but that doesn't mean I have to like it. I am doing this for the sole purpose of figuring out what food allergies I have. After the 28 days are over you slowly add the food groups back in one at a time while monitoring your reactions. I have no doubt it will work, but 5 days in I pray that the 28 days will go by sooner than later. As a student of the art of making sugar and wheat into something that is truly good, true, and beautiful I feel as if my mission in life is not complete and there is still much to learn.

This "plan" eliminates basically all carbs - no potatoes, rice, bread, pasta, wheat, corn - nothing - zilch. Oh, we can eat quinoa - which is very weird tasting to me, and I am trying to like it - really I am. Also - limited fruit - and definitely no bananas, or grapes. Lots of veggies...big whoop there. No dairy - milk, cheese, yogurt, - not even rice or almond milk is allowed. The hardest has been no sugar. No honey, no maple syrup. We can however use this natural sugar look alike..."xyitol". I still haven't figured out exactly what it is, but apparently it is safe for diabetics. In a desperate search of something to quench my sweet tooth over the next 23 days I finally came upon an acceptable "cheating chocolate" solution. I made my own chocolate chips...well I guess they were more like chocolate bits. Very excited about this recipe. I am also a huge fan of carob so I made mine with carob powder. However, it should work just as well with cocoa powder. Also, it calls for coconut oil - which is awesome, but I imagine you could also use butter if you don't have coconut oil on hand. I have never used coconut oil before this recipe, so I am not sure if it will yield the same results, but it is worth a try.

This recipe is from Nourishing Traditions, a book my friends so graciously gave me with the hopes of converting me to the "healthy" way of life. Nice try guys, but I think I will stick with my refined sugar. : )

Carob or Chocolate Chips:
adapted from Nourishing Traditions
Makes 1 cup

3/4 cup carob powder or cocoa powder
1/4 cup of rapadura or xyiltol
1 cup coconut oil or butter
1 tablespoon vanilla extract
1 teaspoon chocolate extract (optional)

Place all ingredients in a glass container and set over pan of simmering water until melted. Mix together well. Spread mixture on a piece of buttered parchment paper and allow to cool in the refrigerator. When hardened, remove parchment paper and cut into chips. Store chips in an airtight container in the refrigerator. Because the coconut oil does melts easily, keep this in the refrigerator.

Good luck!

Monday, May 18, 2009

German Chocolatekake

I have now been tasked with making monthly birthday cakes for 40-50 people at work. This is a good thing, because cake has never really been my forte and it is forcing me to improve my cake making skills. One reason I don't make a lot of cake is because my family tends to not eat it that fast...thus it is up to me to finish it off. Not a good thing for my trim and perfect waistline. : ) I had requests for German Chocolate cake this month...and the timing just felt right. In the past I have always used the recipe on the back of the baker's German chocolate box - this always yielded a nice result, but I wanted more out of my cake this time. Although I like that recipe, I feel the cake was always a little too light, too fluffy, too original for my fine gourmet pallet...ha. I googled tons and tons of recipes for German Chocolate cake - websites, blogs, cake experts...etc. I finally found a recipe that called for all the things I wanted in my cake...buttermilk for moisture, coffee for richness, and a nice combination of cocoa powder and melted chocolate. Coffee was the selling point for me, I think coffee and chocolate make the perfect marriage of flavors - sweet, subtle, comforting, and just plain darn beautiful - everything a marriage should be! I used the original baker's coconut pecan icing - because it rocks and is incredible. I wanted to take a picture to show you all how wonderful this cake came out, but I was too slow, and a 1/2 eaten cake with random fork and teeth marks in it is not that appealing looking. Yeah, it was that good. The cake was slightly brownie-ish in texture - smooth, semi-dense but light, sweet. It was so good you could eat it sans the icing if you wanted...but the icing was so good I had to use it. I found this recipe on the Joy of baking blog...I had never been there before, but was very pleased with this recipe and intend to return in the near future.

If you have never eaten a perfect cake before today,
This is bliss, that is all I can say.

Some tips or pointers:
- I used Baker's German chocolate squares instead of semi-sweet chocolate.
- I don't like cake flour. It is too bleached for my likes. I used 2 cups all purpose unbleached four and 1/4 cup corn starch...sifted of course.
- If you don't have buttermilk you can do two things. One - add 1/2 tsp. vinegar, or lemon juice to one cup milk - let it sit for a few minutes - voila - buttermilk - nice and tangy...of course I prefer the thick stuff from the store. Also, you can use yogurt or sour cream if you want instead of the buttermilk. Ultimately you want the tangy flavor and the acidity that will tenderize your cake.

Cake:
http://www.joyofbaking.com/GermanChocolateCake.html

Icing:
http://brands.kraftfoods.com/bakerschocolate/main.aspx?s=recipe&m=recipe/knet_recipe_display&recipe_id=51053

Enjoy, and please share this cake I don't want to be partially responsible for sending anyone to their grave early : )

Tuesday, May 12, 2009

Some stuff I made that was pretty much awesome!


Okay - here are a few things I have made this month. First we have a Lime tart in a coconut shortbread shell. I am not the biggest fan of citrus and all the sourness it has to offer the world. Let's put it this way - If citrus was the last food on earth I probably still wouldn't eat it. Unfortunately, one of my chef's loves citrus and has to add zest to everything he teaches us to make...on most days I will spend at least 10 minutes trying to convince him to go without it. : ) However, I was pleasantly surprised by how much I actually liked this tart - I think the subtle coconut in the shell really complimented the citrus flavor. I also reduced the lime juice by 1 ounce...take that Chef! : ) Also, most people decorated the top of their tarts with the traditional Medusa look - covering the entire top of the tart. I thought the filling was so pretty and deserved to be seen. I also thought the lime zest made it pretty obvious that it wasn't a lemon tart, but was indeed a lime tart. As you can see, I am still working on my torching skills. : ) I was just playing around with the meringue and came up with this sun flower like pattern that I was pleased with. Kudos to originality!


Next we have a Sour cream Oreo cheesecake. Cheesecake tends to be so heavy tasting and really sits in your stomach - by using 1/2 sour cream and 1/2 cream cheese it really lightens cheesecake up. I made a chocolate tart bottom ahead of time and baked my cheesecake separately in a spring form pan. Then placed the cheesecake on top of the shell and covered it with crushed oreos. I was very pleased with the end product and will definitely make this one again with the addition of a fudge sauce drizzled on top.


Last, but not least we have a simple yet elegant tea cookie - Diamante Cookie. This is an easy icebox cookie that is mixed and then rolled into a log, chilled, brushed with egg wash, rolled in raw sugar crystals, sliced, and then baked. So delicious! Last year for my birthday my friend Maggie gave me some shortbread cookies from Dean and Deluca similar to these, but they had crystallized ginger bits in them. Next time I plan on adding ginger to mine. These are awesome and would make a sweet gift for anyone! They also freeze well.