Friday, June 21, 2013

Chocolate Peanut Butter Banana Smoothie


You know when you let your bananas ripen too much and they turn just a shade too dark to eat? This happens all the time at my house!  I can almost guarantee to you that no matter the time, day, or week if you walk into our kitchen there will be a rotting banana on the counter.  Don't get me wrong - we love bananas! We love them so much that whenever one of the 3 adults that lives at the house goes out we stop and buy them.  So many times we will all buy bananas on the same day.  One day we will figure out a better system, but until then we will make do.

I never throw away the bananas that are too ripe.  I throw them into the freezer instead.  Then I use them for  2 things.  1 - banana bread - just take them out of the freezer and let them defrost.  Or 2- I make them into a smoothie.  For this I cut the skin off the frozen banana, cut it into chunks and blend.

Now that the hot weather is upon us I find myself craving this smoothie all the time!  It is so delicious, simply sweet, and refreshing!  The key to a good smoothie is a good blender! I recently bought this blender and have been very pleased with it!  I decided to go with Kitchenaid - since I love their stand mixers, and also because it had good online reviews.  Before this blender we had a cheap one that was terrible - it took forever to make a smoothie, and it never did really blend everything - there were always chunks left.  No bueno.

Haha...just realized I grabbed the coconut sugar for this picture and not the cacao powder...you get the idea though...right? 

Chocolate Peanut Butter Smoothie
For one - or 2 smaller portions for 2

1 frozen banana - skin peeled off and cut into a few large chunks
1 TBS Cacao Powder or cocoa powder
1 TBS ground flax seed
1 TBS honey - or less if you don't like it this sweet
1-2 TBS of peanut butter (depends on how strong you want the PB flavor) Can also use any nut butter you like
1 cup almond milk...or whatever milk you use
handful of ice

Place all ingredients in blender and blend until smooth!


 Make this smoothie, go sit out by the pool, soak up the sun, and listen to this song!

Eat your heart out!

Dagny


Tuesday, June 11, 2013

Super Simple and Super Scrumptious Doughnut Holes


I had a perfect weekend this past weekend.  I had a double date brunch with wonderful friends and good food.  Ran some errands, napped a lot, exercised, watched some TV, went to Mass, stayed in on a rainy afternoon with my man and made a brunch of doughnuts, bacon, and fresh orange juice, and just chill-axed.  Exactly what I needed!!!  Life has been crazy busy and it was so nice to have an uncommitted weekend...especially since I am going to busy for the next 100 weekends in the foreseeable future! : )

I was just talking to a friend of mine about how important it is to take a step back from your regular crazy routine of life every once in a while to rest, relax, and re-evaluate.  It is so easy to get caught up in the chaos of life that you don't even realize how tired you really are.  I honestly believe everyone should take one hard core relaxing week of vacation a year...and then one day of doing nothing once a month.  How nice it would be if we could all afford that luxury!  I am trying to get better at saying no to invitations and obligations when I know I just can't manage to squeeze it all in.  I have to do what I can with what I have been given, and I want to do what I can in the best possible way - and if I am spread to thin then all areas of my life suffer.  Oh the balanced life - how you taunt us so!


I suffer from this weird disease of wanting people to always have the best possible food at every moment.  I hate going to something knowing there will not be snacks and there should be.  I honestly believe that if people are hungry they will not have a good time, and they will not stay somewhere.  For this reason I lure my guests with too much food with the hopes of them having the time of their life and wanting to stay among friends as long as possible.  I guess I should call this disease "extreme Southernhospitalityitis".  I realize this is not a normal mindset to have, and am trying to overcome it by buying a bag of fake food every once in a while when I am in a time crunch...but really...it is painfully hard for me to do this.

If you decide to have people over last minute for brunch - this recipe is a fun and quick thing to serve.  Have you ever made doughnuts before?  If you haven't then you are missing out!  This doughnut recipe is so simple it is shocking!  We had fresh doughnuts on the table in less than 20 minutes!  The important thing to monitor is the correct oil temperature.  If the oil is too cold the dough will just absorb the oil like a sponge and you will have a super heavy and greasy nasty doughnut.  If the oil is too hot the outside will burn and the inside will be raw.  I made the mistake of having the perfect temperature for the first batch, then didn't check the temperature for the second batch - forgetting that once you put the cold dough into the hot oil the first time the oil temperature will drop...so you have to wait a few minutes and bring that temperature back up.  When you scoop the dough into the oil they will quickly form these pretty perfectly round little doughnut holes magically before your eyes...it really is fun to watch!

This was the first recipe that popped up when I google searched for "doughnut hole recipe"...Thanks to Girl vs. Dough for this winner!


Doughnut Holes

adapted slightly from the original 

  • 1 1/4 cups unbleached all-purpose flour
  • 1/3 cup sugar or brown sugar
  • 2 tsp baking powder
  • 1/4 tsp nutmeg
  • 1/4 tsp cinnamon
  • 1/2 tsp salt
  • 1  egg
  • 1/2 cup milk (or almond milk-can probably use coconut and rice milks as well)
  • 2 tbsp melted butter (can probably swap coconut oil here)
  • vegetable oil

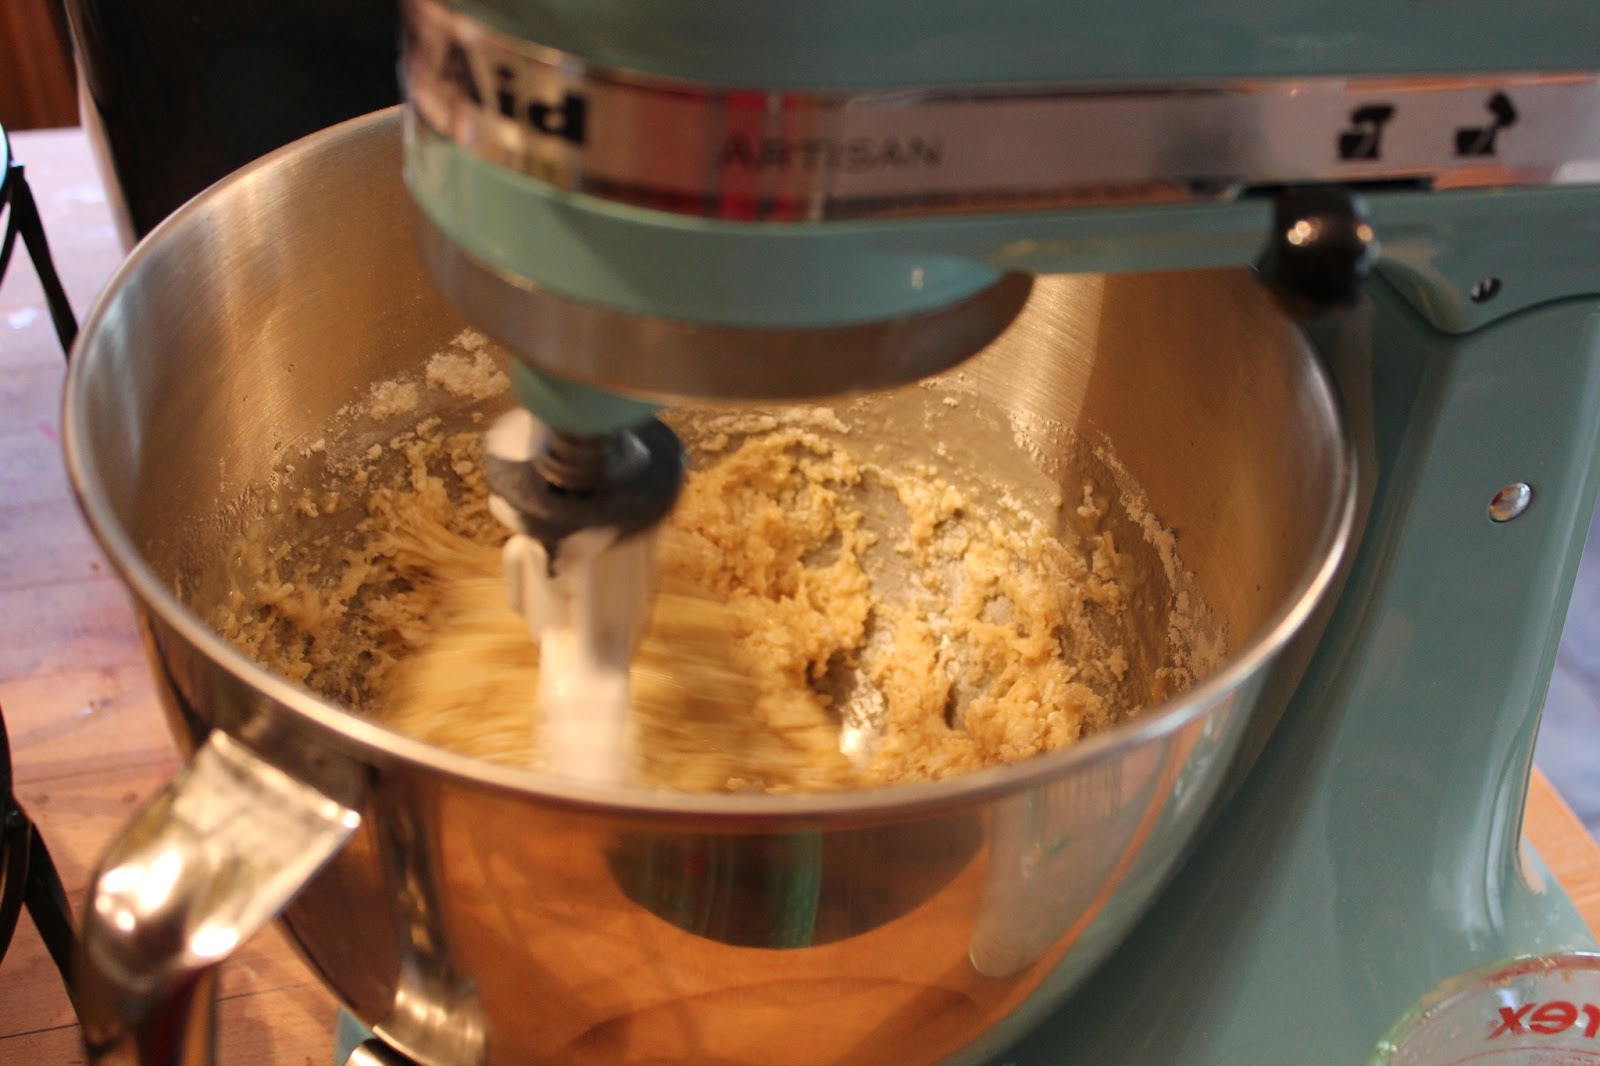
  • In the bowl of a stand mixer, combine flour, sugar, baking powder, nutmeg and salt. Add in milk, egg, and melted butter, and mix until well combined.
  • Fill a large skillet or medium pot with vegetable oil, about 2 inches deep. Using a fry thermometer, heat oil to about 375 degrees F. Make sure it stays around that temperature each time you fry the dough.
  • Set out several stacked paper towels next to the stove for drying the doughnut holes, along with a cooling rack with parchment paper underneath.
  • When oil is ready, place about 5-6 teaspoonfuls of dough at a time in the oil and fry on each side for about 1 minute (2 minutes total). I used a small ice cream scoop for this and it worked great!  Remove from the oil and place on paper towel to soak up excess oil. Then, using a fork, roll doughnut in glaze or powdered sugar. Then place on cooling rack to cool slightly before serving warm.

  • Glaze:
    8 oz powdered sugar
    3 TBS milk, water, or almond milk
    1/4 tsp vanilla

    Whisk together until smooth.


  • We were all set to go see one of my favorite bands this week, Mumford and Sons, but one of the guys in the band got really sick...so the concert is postponed.  Say a prayer that he recovers and that they reschedule the concert for when I am in town! : ) 

                                           
    Go on vacation, sleep in, listen to this song and make these doughnuts when you wake up and be sure to share them with someone!

  • Eat your heart out!
  • Dagny


Friday, June 7, 2013

Homemade Sno Cone Syrups...yum


Nothing says summer like a refreshing sno-cone!  Sno cones are awesome, but sometimes they are too sweet and sugary for my taste.  My church group hosted a big Parish Wars event this weekend - 8 Parishes came up with teams of Young Adults and we played sports all day in the hot sun...and we had a sno cone machine!  Needless to say the sno cone machine was put to good use - the machine was running all day long, and people loved them!  Being the nerd and stickler for quality food that I am - I decided to make homemade sno cone syrup for this big event.  I was surprised at how easy it was, and how delicious it was!

I just bought a bunch of condiment bottles at Target and relabeled them.  I really wanted the clear bottles, but couldn't find any.  This is what the bottles look like after being handled by 80 people for many many hours - they are pretty weather beaten.  The most popular flavor was coconut, raspberry, and then the mango lime.  Don't think anyone wanted the root beer flavor -  which is my family's favorite! Make sure you strain out any seeds or fruit skin/pulp - otherwise they will clog up the spout - like they did with the blueberry flavor...and then no one will try it because they can't get to it! : )  You can make these syrups ahead of time and store them in the fridge...not too sure for how long, but I imagine they will last a while since they have so much sugar in them!


Root Beer Sno Cone Syrup
  • 1 cup water
  • 2 cups granulated sugar
  • 2 teaspoons Root Beer Extract
  • Brown food coloring - optional

  • Bring the water and sugar to a boil, stirring continuously until the sugar is dissolved. Remove from heat and add the Root Beer Extract and food coloring, stirring until well blended. 

  • Remove from heat and allow to cool completely. Pour desired amount over shaved ice or into container and store in refrigerator.

Lemon-Lime Sno Cone Syrup

1/2 cup lemon juice
1/2 cup lime juice
2 cups granulated sugar
Drop or 2 of green food coloring or chlorophyll

Bring to a boil sugar and juices. Add a drop of green food coloring.  Then, let cool until completely cold.  Pour over shaved ice or ice blended in a blender.


Raspberry or blueberry Sno Cone Syrup

1 cup granulated sugar
1/2 cup water
1 bag frozen raspberries or blueberries (10-12ounces)
1/4 cup fresh lemon juice

  • Bring to a boil sugar and water. Then, let cool until completely cold.
  • Defrost raspberries or blueberries and combine with lemon juice. Blend until very smooth in a blender. Strain through a sieve to remove seeds or skins..
  • Combine cooled syrup and raspberry mixture and pour over shaved ice or ice blended in a blender.

Coconut Sno Cone Syrup

3/4 cup granulated sugar
3/4 cup water
1/4 cup canned coconut
2 tsp coconut extract

Bring sugar, water, and coconut to a boil until sugar is dissolved.  Remove from heat and add the coconut extract.  Add blue food coloring if you want.  I added it because at this pint the syrup  was clear and if people can't see what they are pouring they just keep pouring.


  • Mango Lime Sno Cone Syrup
  • 1 cup granulated sugar
  • 1/2 cup water
  • 2 cups fresh or frozen mango pieces
  • 1/2 cup fresh lime juice (about 8 limes)
  •  Boil sugar and water. Then, let cool until completely cold.
  • In a blender, mix mango pieces and lemon juice to a very smooth puree.
  • Combine cooled syrup and mango-lime mixture. Pour over shaved ice or ice blended in a blender.


Thursday, April 25, 2013

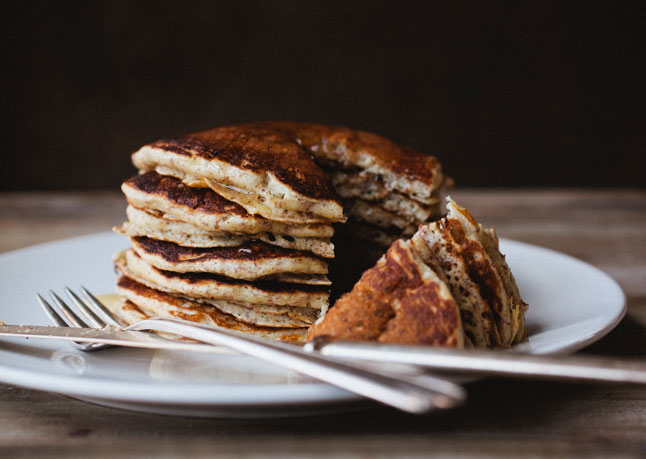
Lazy Saturday Morning Oat and Flax Pancakes

FYI - I didn't take this picture...still haven't taken the time to learn my new camera!

I go through phases where I use the same pancake recipe over and over again for months, and then randomly decide to switch recipes on whim.  I also go through phases where all I want for dinner is pancakes.  News flash...I am in this phase now!  Maybe it is because I am busy, and I get home late and sometimes I am hungry - a heavy meat filled dinner after 8 pm sounds so unappealing always, so instead I make pancakes or eat cereal.  I know it is terrible to eat at such late hours, but if I don't eat something my stomach will growl all through the wee hours of the night.  Come on, I know you eat cereal at night too...all the "cool kids" are doing it now. : )

I recently ran a crawfish boil at work for 300 people - it went swimmingly - and I really want to bring my pancake griddle to work one day and make all my fellow employees pancakes to thank them for helping me execute such a successful event.  I think I will see if we can have a "bring your griddle to work day" every month.  That would be awesome!  Nothing makes a Monday more bearable than eating pancakes at your desk!

Can you believe summer is almost here?  I am going to try and post lighter and healthier recipes that are season appropriate instead of brownies and pancakes all the time...please note the key word being "try".  I tried to come up with a balsamic roasted vegetable quinoa recipe, but so far I haven't been pleased with the results.  Hopefully my next attempt will be post worthy!


Lazy Saturday Morning Oat and Flax Pancakes

adapted from Bon Appetit.com

1 cup whole wheat flour
1/2 cup flaxseed meal (ground flaxseed)
1/2 cup oat flour (just belnd flour in a food processcor, or I used Oat bran)
2 tablespoons raw sugar (or coconut sugar, maple sugar, maple syrup, or honey)
1 tablespoon baking powder
1/4 teaspoon kosher salt
2 cups buttermilk (or coconut milk, almond milk, whole milk with 1 tbs of lemon added to it 1st)
3 large eggs, beaten to blend
1/4 cup (1/2 stick) unsalted butter, melted, cooled

Whisk first 6 ingredients in a large bowl. Whisk buttermilk, eggs, and butter in a medium bowl; add buttermilk mixture to dry ingredients and whisk just to combine (do not overmix; small clumps are okay).Heat a medium nonstick skillet over medium heat. Lightly coat bottom of skillet with nonstick spray. Working in batches, use a 1/4-cup measure to spoon batter into skillet. Cook until pancake bottoms are golden brown and bubbles begin to form and pop on top, about 3 minutes. Flip pancakes and cook until golden brown and just cooked through, 1–2 minutes longer. Divide among serving plates and serve with honey or agave, if desired.


Monday, April 1, 2013

Cinnamon Bun Bread and an Engagement!


Okay folks, Lent is over so I won't feel as guilty about posting terrible bad for you delicious sugar recipes anymore.  The Easter season is upon us - bake away!!!

I made this scrumptious dish this past weekend - and let's just say when I went to get a second piece I was sad to see there was nothing left in the dish!  This is a quick yeast bread - seems like a contradiction I know, but it really does make sense when you bite into it.  If you are craving cinnamon rolls but don't have the time or patience for them - make these!

I have been preoccupied lately with some wonderful new things in my life : ) , and because of this my lovely little blog has been neglected.  I have a whole slew of recipes building up that I want to share with you, so please be patient with me as I slowly - very very slowly get them posted.  One of my favorites is this awesome raw broccoli salad recipe - so hopefully that one will be next!

Did I tell you my baby sister got engaged?  Well holy moley she done went and got herself a man!  They got engaged over Spring Break - which was a shock and surprise to us all!  I mean we saw it coming, totally knew he was "the one", just didn't think the engagement would be until Christmas.  So happy and excited for them - she picked a real winner of a guy, and I know he will love her, honor her, and cherish her which is all we could really hope for.  I have to say, I have really lucked out in the brother-in-law department.  The three guys my sisters have found are all pretty awesome.  They are also pretty drastically different - which is really funny.  My older sister's husband is Massachusetts Irish, quiet, contemplative, philosophical  and kind.  My younger sister's husband is Mexican, loud, crazy, fun, and has a super big heart.  And now my baby sister's guy is a ginger, responsible, practical, funny, and a sweet heart.  I find it funny that they all choose such different guys!  
The Happy Couple!

Oh boy, so brace yourself as the Syversen family gears up and gets back into wedding planning mode again - watch out people, and Dad - seriously you should confiscate all your credit cards immediately - trust me on this one.  

Heating the milk to the proper temperature
Mixing the dough!
The dough taking a rest...just chilling like a villain
Mixing the cinnamon swirly goodness together
Cinnamon swirled in ready to go in the oven
Yum Yum


Quick Cinnamon Bun Bread
adapted from several sources
3 cups all purpose flour
2/3 cup granulated sugar
1/2 tsp salt
8 tsp active dry or rapid rise yeast
1 1/3 cup warm milk (100-110F)
6 tbsp vegetable oil or coconut oil
1 tsp vanilla extract
2 large egg

Topping
6 Tbsp butter, room temperature
1 1/2 cups brown sugar
2 tsp ground cinnamon
pinch ground cardamom
Icing 
1 cup powdered sugar
1-2 tbsp milk or cream
Lightly grease an 9x13-inch baking pan.In a large bowl, combine flour, sugar and salt. Dissolve the yeast in a measuring cup filled with the warmed milk, then stir milk mixture, vegetable oil, vanilla extract and egg into the flour mixture. Mix well, until very smooth. Pour into prepared pan and let rest for 15 minutes.
While the dough rests, mix together topping ingredients: butter, brown sugar, cinnamon and cardamom in a small bowl using a fork until all the butter has been incorporated into the sugar and mixture is crumbly. Sprinkle evenly on top of rested dough and swirl the mixture into the dough with a spatula or knife.
Place pan into a cold oven, then set the oven temperature to 350F.
Bake for about 25-30 minutes, until bread is lightly browned at the edges and the center of the bread springs back when lightly pressed.  
Cool for at least 30 minutes before whisking the powdered sugar and milk together to form an icing and drizzling it onto the bread.  Serve warm. Leftovers can be reheated.

Tuesday, March 12, 2013

Balsamic Roasted Brussels Sprouts


Something must be wrong with me.  Every night all I want to do it make and eat chocolate and brownies!  I must have been bitten by the chocolate bug while I was sleeping - it is the only logical explanation.  Hopefully I will eventually develop some super human skills - at least I better, because as of this very moment the only thing I have gained from the bite is 5 pounds.  DARN YOU brownie bug!

I have 2 recipes up and ready to post - molten lava cookies, and gooey chocolate caramel cake - I have decided to spare you from posting 4 chocolate recipes in a row and instead post a recipe for something nice and healthy to counter act these evil sugar filled recipes.

I bring you Brussels sprouts...on a platter...coated in balsamic syrupy goodness...full of flavor...and absolutely divine!

My family LOVES Brussels sprouts!  We devour them so quickly it is crazy.  I basically love them cooked in any way - they are that amazingly delicious.  Roasted is of course my preferred method, but sometimes when I just need a quick Brussels sprout fix I toss them in boiling water for a few minutes.  More recently we have become obsessed with Brussels sprouts and they are found listed on every single grocery list just like milk and eggs - they are that essential!

I know this might sound weird and flavor clashing - but I really love eating Brussels sprouts with spicy hummus.  It makes the perfect light dinner on a week night, or a great Lenten meal - you should try it - you won't regret it!


I haven't done a "random facts" piece in a while so...here are the top 7 things you should know about Brussels Sprouts:

1)  As weird as it sounds and looks it really is "Brussels" and not "Brussel" like I thought.  Although it is unclear many speculate that this illusive vegetable originated in Brussels, Belgium.

2)  Have you ever seen Brussels sprouts growing?  It is pretty cool looking.  They grow on these tall thick stalks, in these fun little cluster patterns.  We used to go grocery shopping at this one store for the sole purpose that they sold Brussels sprouts still on the stalk - so cool.

3)  They belong in the Cruciferous family along with the obvious relative cabbage, and the not so obvious kale, collard greens, and broccoli.  All lovely shades of green!  Kale really is pretty - if I get married I want to include it in my bouquet : ) Haha - it would be awesome.

4)   Rumor has it that Thomas Jefferson was a huge fan of Brussels sprouts and grew them at his plantation, Monticello.

5)  Most of the Brussels sprouts consumed in the US are grown in California.

6)  Boiling them is the easiest way to cook them but they do lose some of their nutritional value when you cook them that way.  The best way to cook them is to stir fry, roast, or steam them.

7)  Although they are typically available year round their peak season is September-mid February.


Balsamic Roasted Brussels sprouts
adapted from Ina Garten
1½ pounds Brussels sprouts, trimmed and cut in half through the core
1/8 cup good olive oil
1/2 tsp Kosher or sea salt
1/8 tsp ground black pepper
1 tablespoon balsamic vinegar*
Preheat the oven to 400 degrees.
Place the Brussels sprouts on a sheet pan, including some of the loose leaves, which get crispy when they’re roasted. Add the olive oil, salt, pepper and toss with your hands. Spread out the mixture in a single layer.
Roast the Brussels sprouts for 20 to 30 minutes, until they’re tender and nicely browned.  Toss once during roasting. Remove from the oven, drizzle immediately with the balsamic vinegar, and toss again. Taste for seasonings and serve hot.
*If you want thick syrupy balsamic vinegar - boil your vinegar until it is reduced by half -so if you boil 1/2 cup - boil it until it is only 1/4 cup.  This really increases the flavor and makes it taste even better!
If you want to make these sprouts less healthy you can also toss them with pancetta or bacon before roasting...so for this recipe I sometimes use 3 slices of chopped up bacon - so delicious!

Monday, February 25, 2013

Salted Caramel Brownies


I feel guilty for not posting on my blog frequently.  I hope I haven't lost too many of my readers. : (  Life has been keeping me busy, and in the good way.  My life is full of event after event, and I find myself too exhausted to bake and too wordless to write.  The other day I tried to bake something and literally sat there and stared at my new mixer for 15 minutes before I actually started baking.  My family and friends have been asking me if everything is all right, since I have been so absent from my usual spot in the kitchen.  I have not given up on baking, I just am preoccupied with other things at the moment!  I also find myself truly at a loss for words.  After 4 years of writing posts I can't believe this is the first time I have felt like this.  Don't worry, the next words out of my fingers will not be that I am surrendering and handing in my mixer.  I just wanted to reassure you that I am committed to this blog, and have every intention of carrying on - just waiting for some inspiration!


In the meantime I am going to share another brownie recipe with you.  I know it is Lent, so I apologize to any of you that gave up sweets for Lent - please forgive me!  This recipe was recently posted on the Smitten Kitchen blog - it is rather tasty and I will make it again!  You have to be vigilant when making the caramel otherwise it will burn very quickly - I burnt it 3 times before getting it right!  You will know it is burnt because it smells burnt!

Salted Caramel Brownies

Adapted from the Smitten Kitchen Blog

Caramel
1/2 cup granulated sugar
4 tablespoons unsalted butter
Heaped 1/4 teaspoon flaky sea salt or kosher salt
3 tablespoons heavy cream


Make caramel: Set a square of parchment paper over a medium-sized plate. Lightly butter or coat the parchment with a spray oil.
In a medium, dry saucepan over medium heat, melt your sugar; this will take about 4 minutes, stirring if necessary to break up large chunks. By the time it is all melted, if should be a nice copper color; if not, cook until it is. Remove from heat and stir in butter. It may not incorporate entirely but do your best. Stir in cream and salt and return saucepan to the stove over medium-high heat, bringing it back to a simmer and melted again any sugar that solidified. Cook bubbling caramel for a few minutes more, until it is a shade darker.
Pour out onto parchment-covered plate and transfer plate to your freezer. Freeze until solidified about 20 minutes. 


Brownie
3 ounces (85 grams) unsweetened chocolate
1 stick unsalted butter
1 cup granulated sugar
2 large eggs
1 teaspoon vanilla 
Heaped 1/4 teaspoon flaky sea salt or kosher salt
2/3 cup all-purpose flour


Meanwhile, or when your caramel is chilling, make your brownies: Heat oven to 350°F. Line an 8×8-inch square baking pan with parchment.  Butter the parchment or spray it with a nonstick cooking spray.
In a medium heatproof bowl over gently simmering water, melt chocolate and butter together until only a couple unmelted bits remain. Off the heat, stir until smooth and fully melted. You can also do this in the microwave in 30-second bursts, stirring between each. Whisk in sugar, then eggs, one at a time, then vanilla and salt. Stir in flour with a spoon or flexible spatula.

Assemble brownies: When caramel is firm, remove it from the freezer and chop it into rough 1-inch squares.  Scrape batter into prepared pan, spreading until mostly even. Scatter caramel bits on top. Bake in heated oven for 30 minutes, until a toothpick inserted into the center comes out clean.
Cool thoroughly.

If you want more detailed instructions with pictures check out her recipe here.

Eat your heart out!

Dagny